10 Exterior Door Installation Tips for Global Buyers

Exterior doors are more than visible entry points. They control security, weather resistance, energy use, and daily comfort. For global buyers, installation quality can determine whether a premium door performs as promised.

The U.S. Department of Energy reports that air sealing can reduce annual heating and cooling costs by 10% to 20%. That finding gives exterior door installation practical importance, especially in homes facing strong winds, heavy rain, or temperature changes. A small gap beneath the sill can admit cold air, dust, and water. A slightly twisted frame can make the lock difficult to operate.

Details matter.

The National Fenestration Rating Council emphasizes performance ratings such as U-factor and solar heat gain coefficient. These ratings help buyers compare products, but they do not replace correct installation. The 2023 Global Status Report for Buildings and Construction also highlights the building sector’s major role in worldwide energy consumption and emissions. Better door performance supports wider efficiency goals.

This guide presents ten field-tested installation tips for international purchasing teams, contractors, and property owners. It covers opening measurements, compatible fasteners, sill protection, frame alignment, insulation, drainage, and final hardware testing. Regional wall systems differ, so one method cannot fit every project. That limitation deserves attention.

A reliable installation begins with the actual opening, not the catalog dimension. Use a level, tape measure, moisture-resistant shims, and suitable sealants. Check the threshold after rain when possible. It may reveal problems that a dry inspection misses. No checklist is perfect, but careful verification reduces expensive callbacks and protects the door’s intended performance.
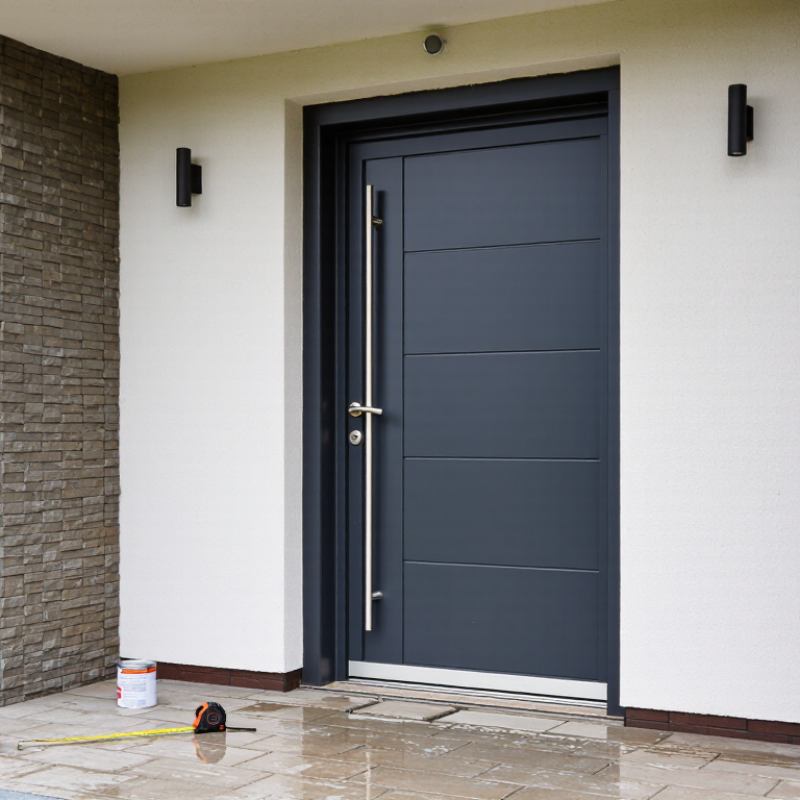
10 Exterior Door Installation Tips for Global Buyers

Classify Climate and Codes: Match EN 14351-1 or NFRC Performance Ratings

Climate and Codes: Match EN 14351-1 or NFRC Performance Ratings

Exterior doors rarely fail because of appearance. They fail when climate, testing, and installation details do not match. Start by classifying the site: freezing winters, humid heat, driving rain, coastal salt, or strong wind. A cold region may require low U-values and careful thermal-break design. A sunny, hot region may prioritize solar heat gain control. Coastal locations need corrosion-resistant hardware and sealed joints.

For European projects, review performance documentation aligned with EN 14351-1 for external pedestrian doorsets. Check declared values for air permeability, watertightness, wind resistance, thermal performance, and acoustic insulation. These values must suit the project specification and local building requirements. Do not treat the standard as a universal climate rating.

For North American projects, use NFRC-certified ratings when required by the authority or energy code. Compare U-factor, solar heat gain coefficient, visible transmittance, and air leakage. A lower U-factor can improve winter efficiency, but it does not guarantee good rain resistance. Small details matter. A three-millimeter installation gap can expose weak sealing. Field teams should inspect sill drainage, shims, anchors, and perimeter sealant before final fixing.

Documentation can look convincing. It can still be incomplete. Confirm the tested size, glazing type, frame material, threshold design, and hardware configuration. Ratings from one configuration may not apply to another. That mistake is easy to make. The safest specification connects the climate, local code, tested assembly, and actual installation method.

Confirm Sizing: Allow a 10–20 mm Installation Clearance Around the Frame

Confirm Sizing: Allow a 10–20 mm Installation Clearance Around the Frame

A precise rough opening protects the door from pressure, movement, and uneven walls. Leave a 10–20 mm clearance around the frame, unless the installation manual or local code requires another dimension. This gap is not wasted space. It allows shims, insulation, and controlled adjustment during fitting.

Measure the opening at the top, middle, and bottom. Record the smallest width and height. Check both diagonals; a difference above 5 mm may indicate a twisted opening. ASTM E2112 highlights the importance of correct rough-opening preparation, shimming, flashing, and sealing. The U.S. Department of Energy also reports that air leakage can represent 25–40% of household heating and cooling energy use. A poorly sealed door can therefore become an expensive weakness.

Keep the frame level.

Use solid shims near hinges and locking points. Do not fill the entire clearance with rigid material, because the frame may bow. Low-expansion foam can improve continuity, but it should not replace mechanical fixing or exterior weather sealing.

I have seen installers measure only once, then blame the door for a masonry problem. That shortcut is hard to defend. Climate matters too: humid regions, cold zones, and exposed coastal sites can produce different movement and sealing demands. Recheck the gap after temporary fixing, before final screws and trim are installed.

Prepare the Opening: Check Plumb, Level, and Square Within 3 mm

For global buyers, exterior door performance begins before the frame arrives. The rough opening should be plumb, level, and square within 3 mm. This tolerance helps prevent binding, uneven gaps, and premature seal failure. Measure the height and width at several points, not only at the center.

Use a reliable spirit level or laser, plus a tape measure for both diagonals. The diagonal measurements should differ by no more than 3 mm. Check the sill across its full width. A slight slope can redirect rainwater, but an uneven surface may twist the frame. Remove loose mortar, dust, and damaged shims before installation.

Measure twice. Small errors multiply.

During installation, secure the frame temporarily and recheck each jamb before tightening fasteners. Place shims behind fixing points, especially near hinges and the strike area. Do not force a bowed frame into position; it may look correct briefly, then create rubbing during seasonal movement. I have seen installers trust a single measurement and adjust the door repeatedly later. That shortcut wastes time. However, site conditions are not always ideal, so record every deviation and compare it with the door manufacturer’s stated tolerance. After fixing, open and close the slab several times. Confirm a consistent reveal, firm seals, and smooth latch engagement before applying final exterior sealant.

Set Thermal Targets: Aim for U-Factor ≤0.30 Btu/h·ft²·°F

For global buyers, set the thermal target before comparing styles or finishes. Aim for a whole-door U-factor of 0.30 Btu/h·ft²·°F or lower. Lower U-factors indicate less heat transfer through the complete door assembly. The U.S. Department of Energy reports that windows and doors can account for 25–30% of residential heating and cooling energy use. That makes the specification worth checking.

Read the certified rating carefully. It should cover the slab, frame, glazing, and hardware area, not only the center panel. The National Fenestration Rating Council evaluates complete fenestration products under standardized conditions. Ask suppliers for the product certificate, test size, and air-leakage result.

A narrow frame can look efficient on paper, yet poor weatherstripping may undermine performance. Small gaps matter.

Installation decides whether the target survives the jobsite. Place the door in a square, plumb opening, then shim behind hinges and the strike area. Seal the sill continuously, but do not block designed drainage paths.

Use compatible low-expansion foam around the frame. Too much foam can bow it. That mistake is common.

Confirm the local climate and energy code before ordering; a U-factor of 0.30 may be suitable in one region but unnecessary or insufficient in another. I would also recheck the rating after changing glass, sidelites, or threshold details, because the final assembly may not match the original test sample.

Fasten and Seal: Space Anchors 150–200 mm Apart and Test Water Resistance

Fasten and Seal: Space Anchors 150–200 mm Apart and Test Water Resistance

A secure exterior door starts with accurate frame positioning, not excessive foam. Use approved anchors every 150–200 mm where the installation schedule permits. Keep anchors square to the frame, and place them near hinges, locks, and corners. The substrate matters. Concrete, masonry, and timber require different fasteners and drilling methods. Never copy one fixing pattern across every market.

Seal the opening in layers. Install a drained sill pan, seal the jamb edges, and leave the exterior sealant joint tooled and continuous. Do not block designed drainage paths. The U.S. Department of Energy estimates that air leakage can cause 25–40% of heating and cooling energy use in typical homes. A small frame gap can therefore become a large comfort problem. Foam alone is not a reliable weather barrier.

Test before handing over the project. Spray the door from the exterior, then inspect the sill, corners, and lock side from indoors. For higher-risk projects, request field testing under ASTM E1105 procedures. Water pressure and exposure time should match the project specification. A common site mistake is testing too gently. Another is testing after interior finishes hide the leak.

Record anchor spacing, sealant batch, weather conditions, and photographs. These records support quality claims across borders. Still, a perfect checklist cannot replace local engineering review, especially where wind loads, driving rain, or unusual wall systems are involved.